Home | Information | Schedule | Links | Communication

Web
& Email Use
Web
Board Conferences
WebBoard
conferences are arranged, or threaded, in a logical hierarchy with three basic
levels. You might liken this hierarchy to the structure of a book, with each
conference being similar to the book's title. A topic is the equivalent to the
chapter's title, while its messages contain the actual content. Each conference
has at least one topic, and each topic contains at least one message, but can
have dozens or hundreds more. Multiple conferences are similar to many books on
a bookshelf.
WebBoard
conferences are set up by the WebBoard manager. You can post and reply to topics
and messages in the conferences, in essence helping to write the books. Keep in
mind that topics should be relevant to the conference and messages should be
specific to each topic. You can start a new topic in a conference any time you
want to change the subject. As your conference develops with more topics, it
begins to resemble a book on a particular subject. This is even more apparent
when messages appear in the Full topic view, which allows you to read and scroll
through several messages in a topic at a time. This feature is discussed in the
section "Editing Your User Profile" later in this help page.
The
WebBoard hierarchy provides a means for you to track information in a logical
and simple fashion--you can zero in on a subject that interests you. For
example, if you have a conference on Great Local Eateries, you could look under
the topic Breakfast Spots to find a good place for your early morning java and
scones. Or say you want to find a great restaurant for dinner. Simply scroll
through the topics until you find one that sounds interesting. Because of
WebBoard's message structure, it's simple to quickly locate the information you
want. Consequently, you can avoid any unnecessary searches through the entire
list of conferences and topics.
Attaching
A Document to the Web Board
Steps:
- Go
the web board
- In
the black band cutting horizontally across the screen, you will see on the
far left the word "post" in white letters. Click on this word.
- Once
you click post, you will see a screen on the right with three boxes.
The first box is entitled Topic. Type the topic of the memo you are
about to post. (For instance "Discussion
Questions Session 1") At the bottom of the page you will see
the largest field which is the "memo field." This is where you
type your message and type your name.
- Between this bottom box and the top box you will see some words with small check off boxes beside each word. On the bottom right of this array you will see a box and the words to the left "Attach file or picture." When attaching a Word or RTF document, you must click on this box. Once you have clicked on this box and have completed the memo and topic fields, then you will click on the word "post" which is found to the far right of the topic field. The picture below shows you what this field you will be working in looks like.
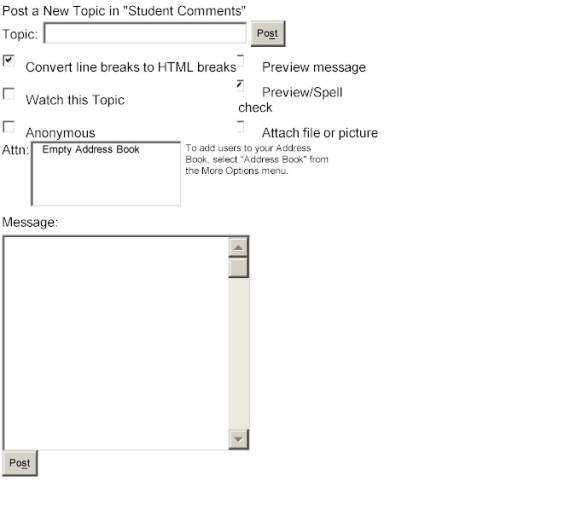
- Once
you click on post you will see the following field.
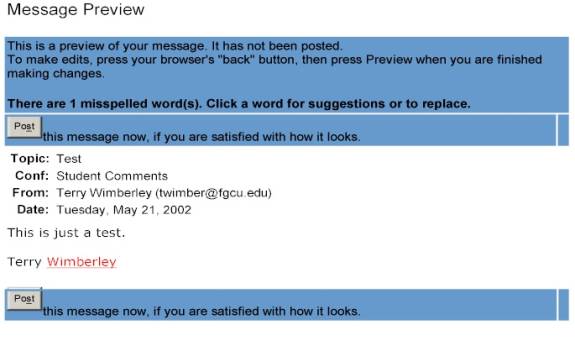
This
field gives you a look at what a message might look like. When you see a word in
red (such as Wimberley) you may click on the word to spell-check it. Once your
are sure the message is OK, you may click on either of the "post
buttons."
- When
you press on the post button, you will get to the following field.
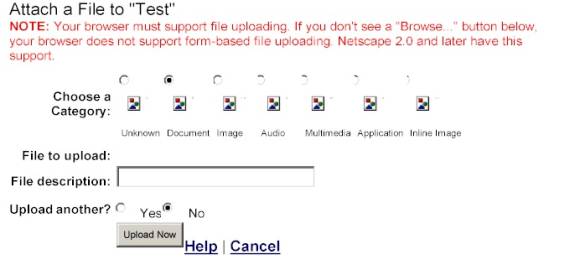
- What
is most important to note is that you must first click on the circle above
the "document" word and accompanying image. Then (you can't see
the dialogue box in this illustration but it is there) you go to the
dialogue box beside the "file to upload" title, and at the far
right of that box is a "browse" button. You will click on the
browse button and search through your C:/ drive directory or from a floppy
(A:/) or other disks where you have saved your document in Word or RTF
format. Once you have completed that, you will type in the name of the file
in the "file description" dialogue box. BE SURE TO USE ONLY
NUMBERS AND LETTERS FOR THE TITLES OF YOUR WORD AND RTF DOCUMENTS, LEAVING
NO SPACES BETWEEN WORDS. ALSO NEVER USE THE "#" SIGN IN A TITLE
SINCE THE WEB BOARD CAN'T OPEN A FILE WITH THIS SYMBOL IN IT. If
you are attaching more than one document then beside the title "upload
another" clock on the circle to the left of the word "yes."
- Once
you have done all of this, then click on the button entitled "upload
now." Thereafter you should get a screen that looks a lot like the one
to follow:
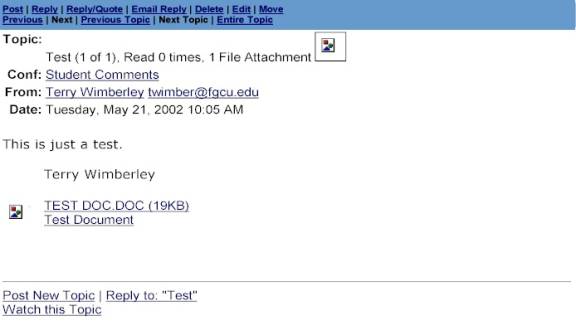
This
is what the finished product looks like. Finally, to be sure that the instructor
can successfully open your file, you should always attempt to open the document
yourself by clicking on it. If you can open it then generally I can too.
Saving
a Document as a Different File Type
When
sending a document as an e-mail attachment or when attaching a document to the
WebBoard, you must save your document using a format that is compatible with
other word processing programs. Most word processing programs have a "Save
As" command that allows you to save documents as a different file type.
"Rich Text Format" (.rtf) is a file format that is compatible with
virtually all word processing programs.
Below
are the basic steps to follow when saving a document as a different file type.
The graphics represent MS Word running on a PC with Windows '95. If you use MS
Works or another word processing program, the basic steps will be the same, but
your screen will appear differently.
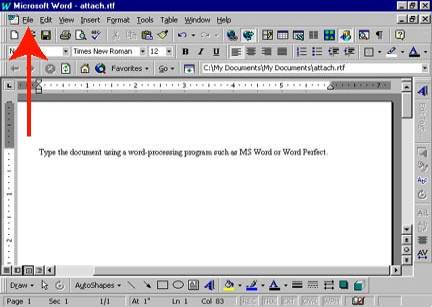
Instructions
1.
Create your document using your word processing program. When you are finished
typing the final version of the document, save the document. For this example we
will use the file name "attach." Do not close the document.
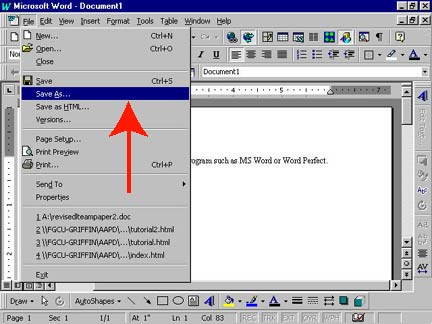
2. With the document still open, click "File" on the menu bar.
3.
Click "Save As."
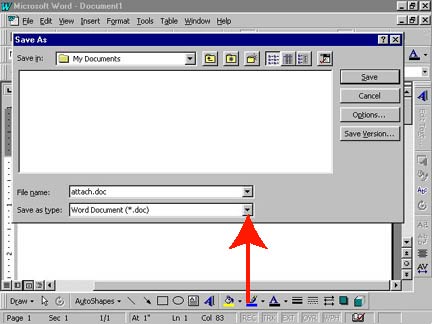
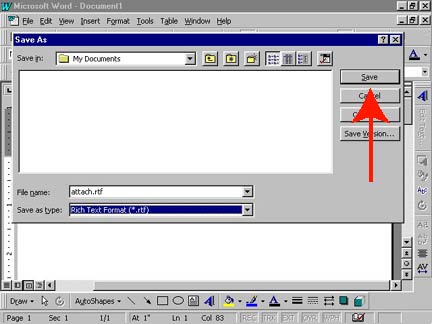
4. The "Save As" dialog box opens. Click on the "Save as type" pull-down menu.
5.
Scroll down the pull-down menu and select Rich Text Format (.rtf). Notice the
other file formats that are available.
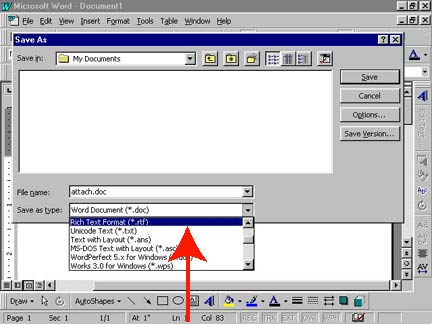
6.Click
"Save."
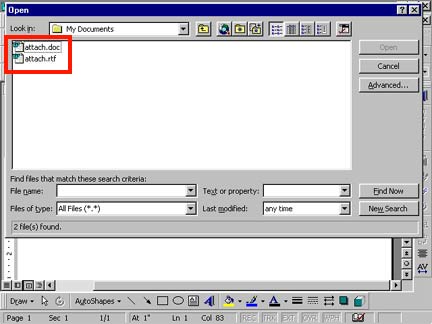
7.
You now have two copies of the same document -- one is a Microsoft Word
document and the other is a rich text file.
Home | Information | Schedule | Links | Communication
Sessions: 1 2 3 4 5 6 7 8 9 10 11 12 13 14